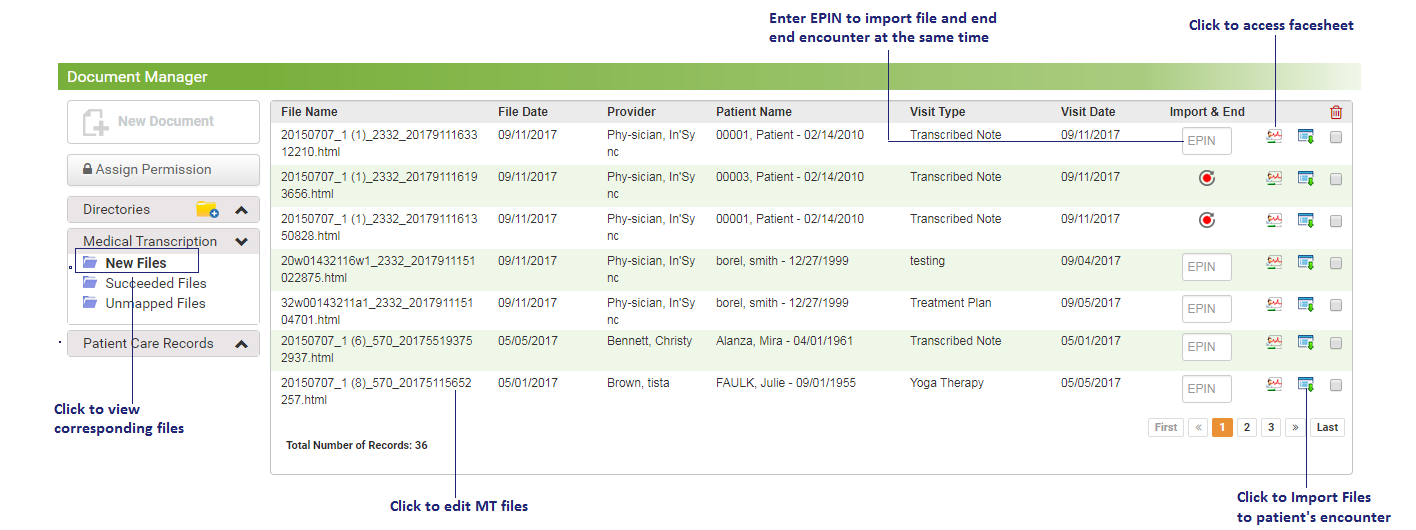
All the MT files added by the MT user and mapped to a facility, patient, and visit date can be viewed in the “New Files” folder. These MT files can be edited and imported to the patient’s encounter that is mapped with the received file.
To edit MT files:
| 1. | On the Document Manager screen, click Medical Transcription (Beta) from the left pane. |
| 2. | From the folders listed, click New Files. The New Files section is displayed on the right side of the screen. |
| 3. | Click the File Name link to view the MT file. |
| 4. | Make the necessary changes and click Save at the bottom of the screen to save the file. |
*Notes:
| • | It is important to note that appropriate tags (i.e., -:: before heading and ::- after heading) are necessary to include the content under the corresponding section in the Encounter note. |
| • | If the tags are not assigned properly, that section will appear in the Other section at the bottom on the Encounter note. |
| • | When the MT file is imported for an ended encounter, the sections (HPI, Physical Exam, etc.) are shown in the Addendum section on the Encounter note. |
| 5. | To import the file at this point, click Import. |
| 6. | To save, import, and end the encounter (with which it is mapped) at the same time, enter the valid EPIN in the Text field provided. |
| 7. | In the New Files section, do the following: |
| • | To import an MT file to the patient’s encounter, click the Import icon  . Once imported, the file can be viewed in the Succeeded Files folder. . Once imported, the file can be viewed in the Succeeded Files folder. |
| • | To import an MT file and end the encounter at the same time, enter the valid EPIN in the Text field below the Import and End Encounter column. |
| • | To access the encounter the file is mapped with, click icon next to the visit date. icon next to the visit date. |
| • | To delete the MT files, select the check boxes below the  icon column, and click the same icon. icon column, and click the same icon. |